Thought I'd give you one more peek at my kitchen. Photographer Susan Gilmore came back for a second photo-shoot; this time for Real-Life Kitchens & Baths -- Winter 2012 (now on newsstands). I'll be taking a short break from LivingTastefully the next couple of weeks. The upcoming wedding of our daughter is consuming my days... Homemade marshmallows for guest favors, a continental breakfast in this kitchen the following morning, etc., etc. You get the picture... Maybe there will even be photos. Will someone remind me to charge my camera's battery? TAKE a LOOK:
6 Comments
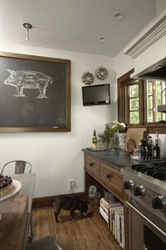
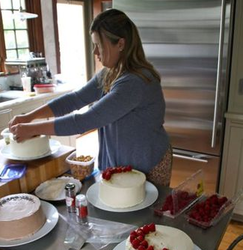
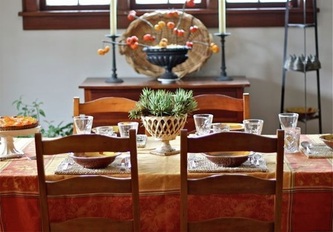
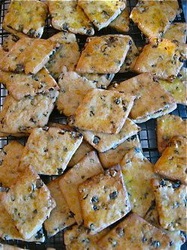
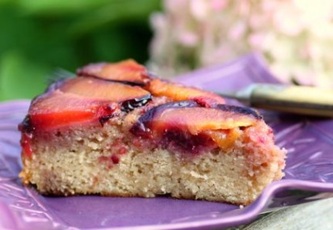
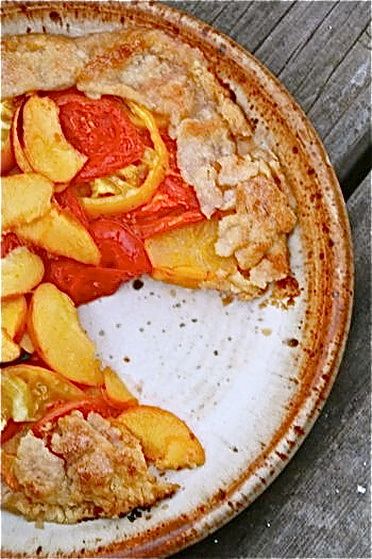
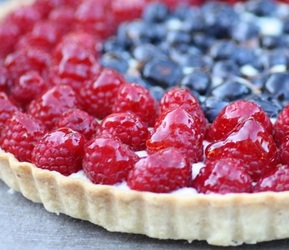
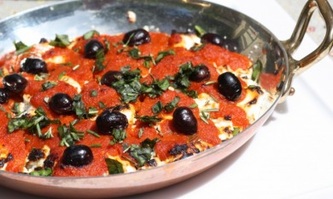
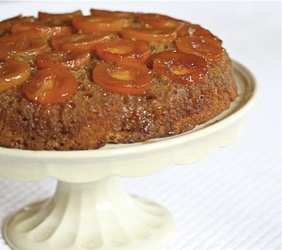
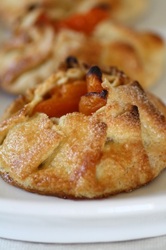
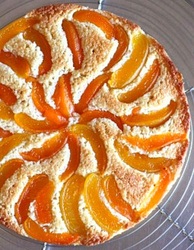
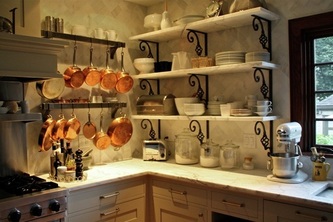
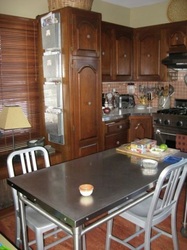
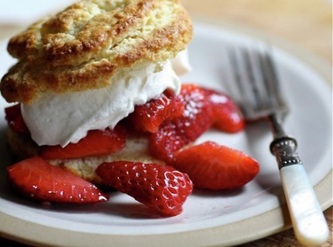
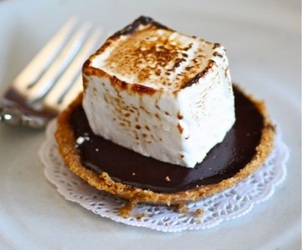
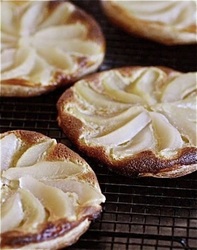
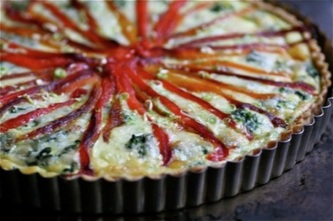
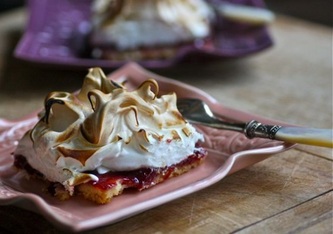
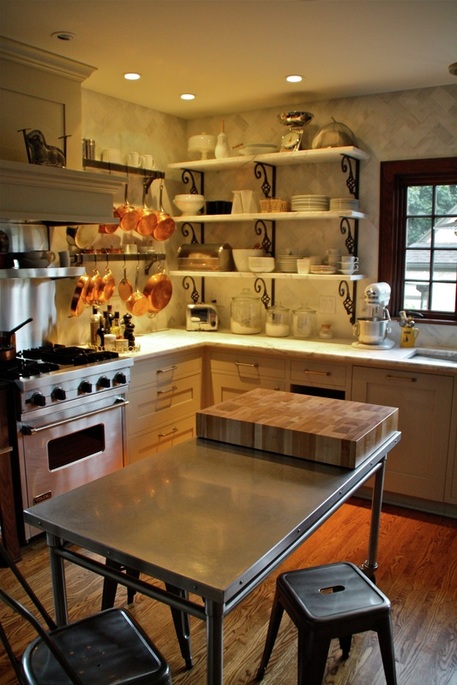
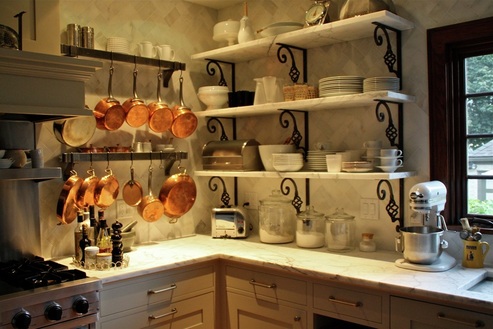
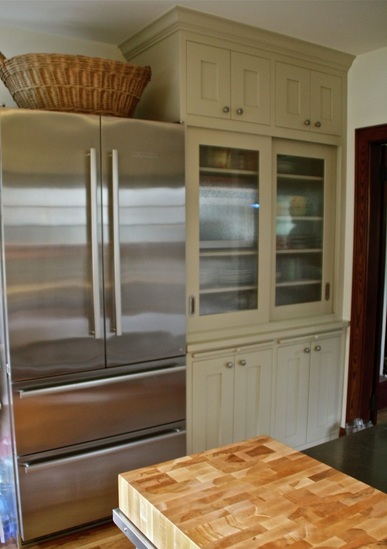
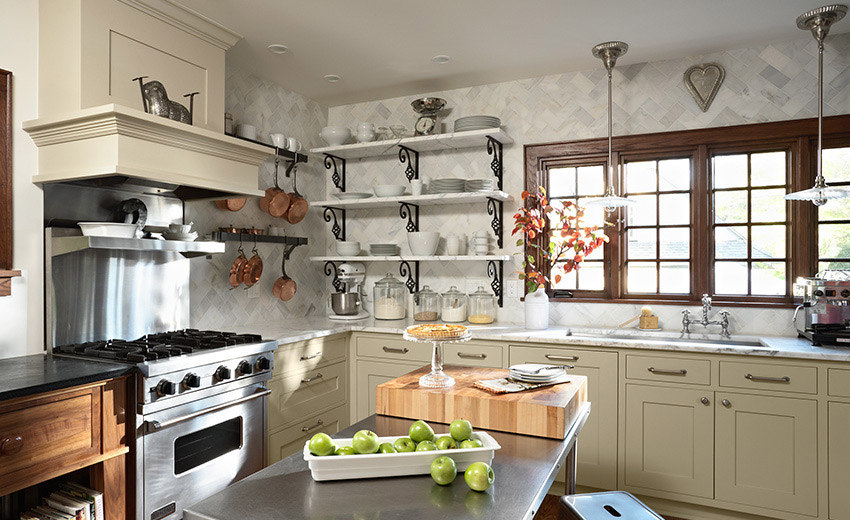
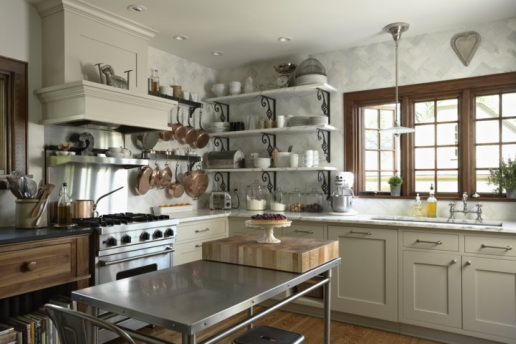  Pipi's the star of the magazine article | photo by Susan Gilmore 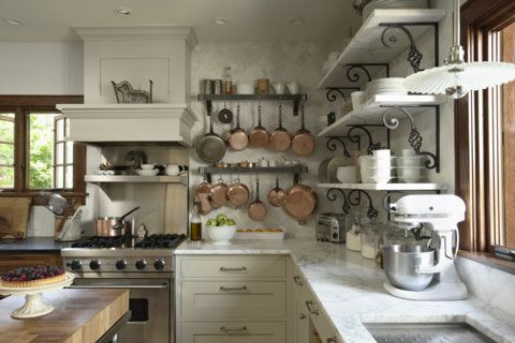 Eileen's Kitchen | photo by Susan Gilmore 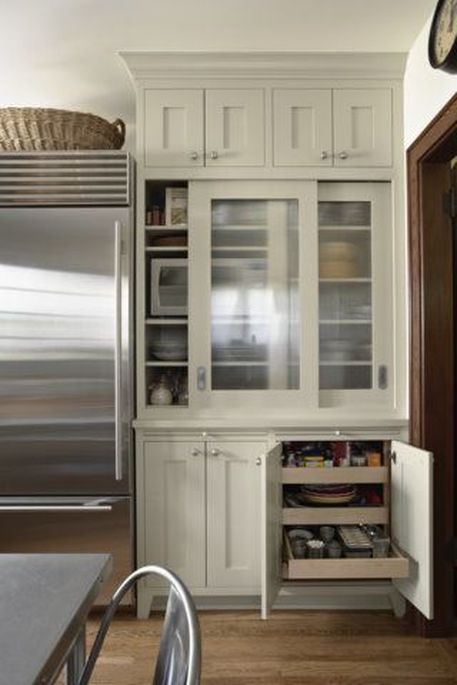 photo by Susan Gilmore | kitchen design by Kathryn Olmstead I'm leaving my kitchen and getting out-of-town for several days. I haven't been to Ohio to visit Antique-of-the-Week Susan for several years now and am timing this visit to coincide with my twin grand-nephews' 4th birthdays (They call me "Great Eileen". Don't you like the sound of that?). Just a short trip, and then I'll be home again to help my daughter pack up for college (sniff, sniff). While I'm gone, check out my new Recipe Index. I have finally completed the listing of everything that has comes out of the Passions to Pastry kitchen! 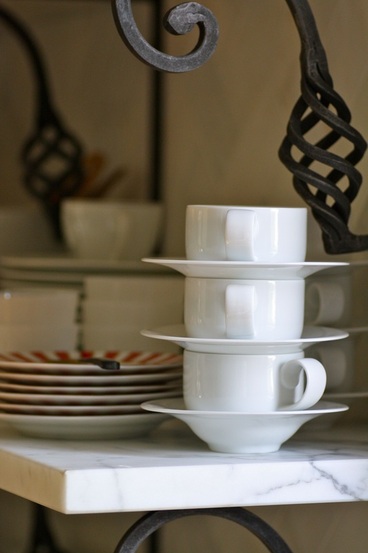 I'll be back home and baking soon. TAKE a LOOK: 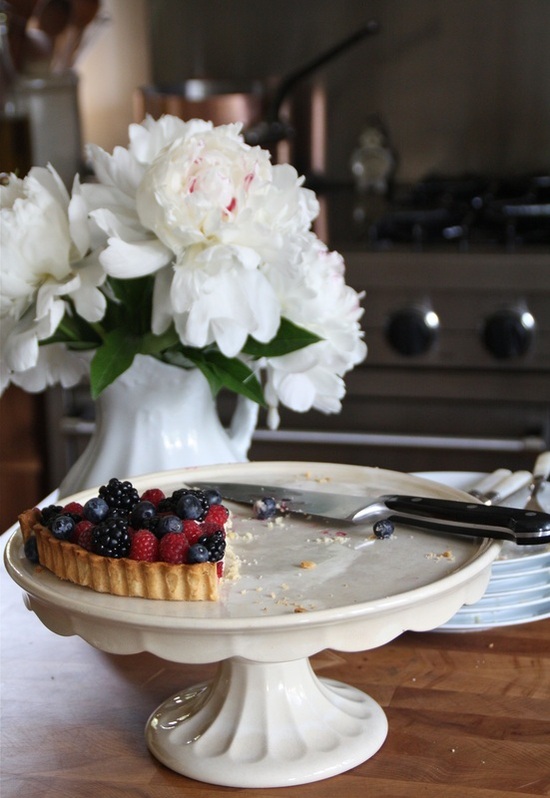 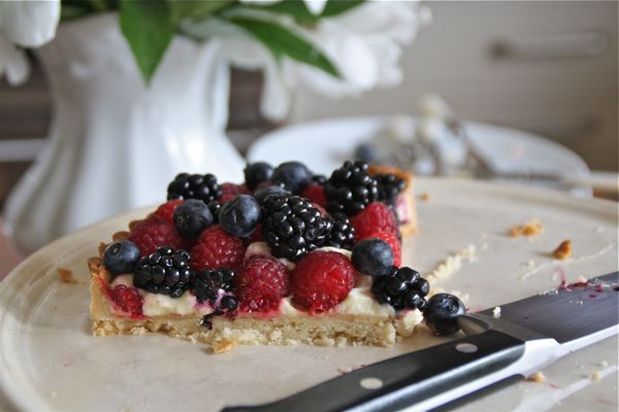 I made this tart with berries and lemon curd cream (get the recipe here) for the photo shoot. Of course, we had to eat it while taking a break! 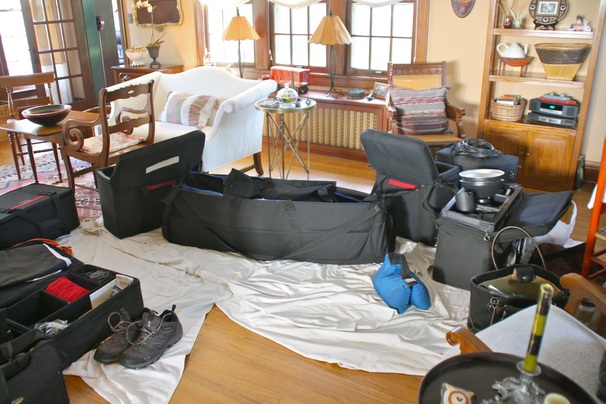 My little Canon camera and lens were feeling very inferior to all of the equipment the photographer, Susan Gilmore, brought along for the photo shoot. I now feel as though I need to go out and buy... something... to take better photos for LivingTastefully.  Like, maybe one of these? TAKE a LOOK:  I've been doing a little baking. 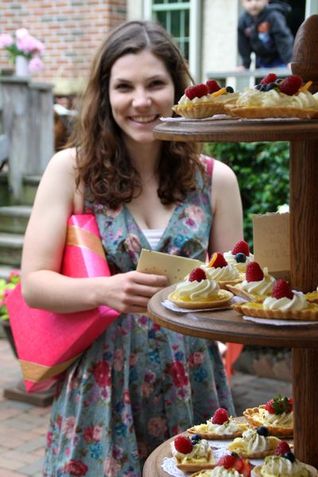 The graduation party for my daughter Claire finally took place this past weekend. 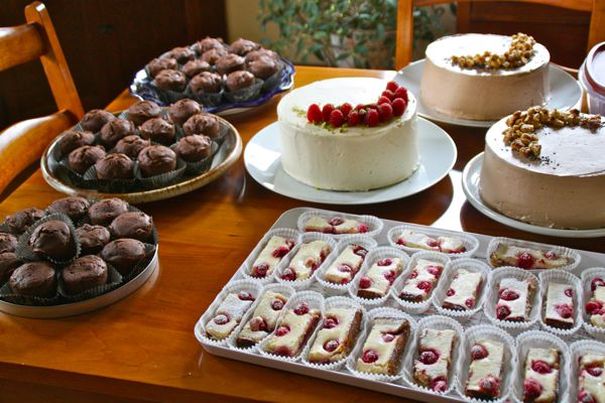 I've spent the past month baking for the French pastry-themed event. Layers for the buttercream frosted cakes were made ahead and frozen, as were the French chocolate bouchons (on the left). There was also Framboise et Fromage de Chèvre des Sablés (shortbread with raspberries and goat cheese), French blueberry, rhubarb, and cherry clafoutis tarts, individual apricot galettes, a caramelized walnut and chocolate tart, small, individual fruit tarts filled with lemon curd and pastry cream, French cookies, Palmiers, and lemon, chocolate, and vanilla pound cakes with fresh berries and cream.  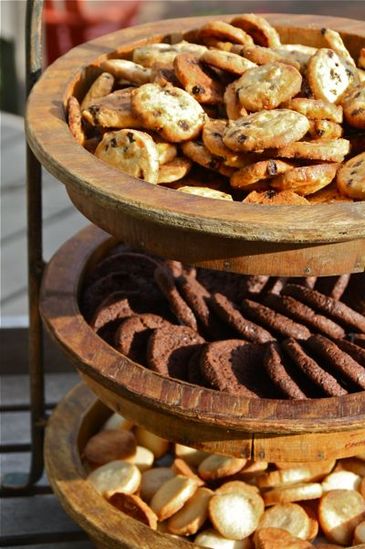 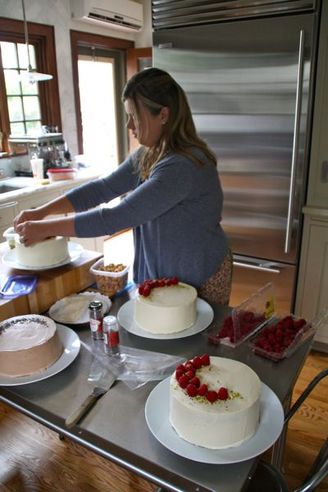 My niece, who is a French-trained pastry chef, flew in to help me finish up the desserts.  My friend Kathy (also the architect who designed my kitchen), was a huge help, making the lemon curd for the tarts (see recipe below), the palmiers, and the lemon poundcake. 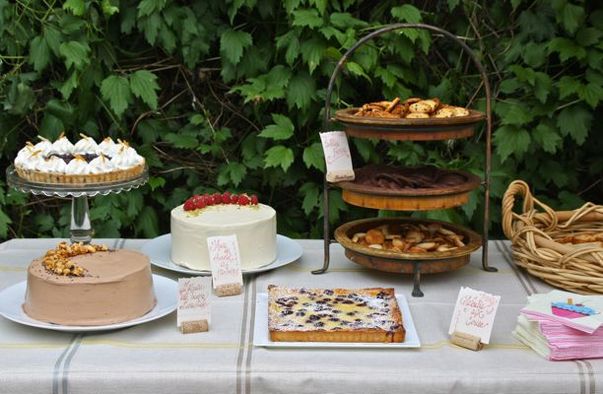 The desserts were served outdoors on the patio. 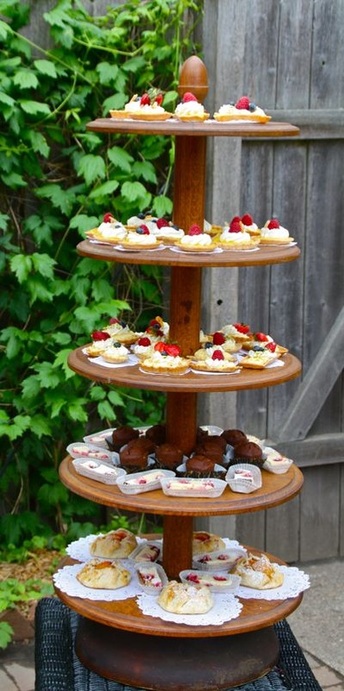 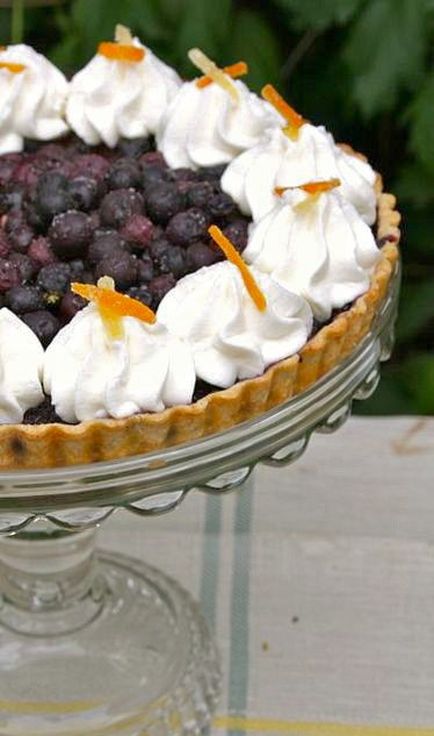  Lemon Curd Tarts with Berries Fine Cooking Magazine For the Lemon Curd: • 6 tablespoons unsalted butter, softened • 1 cup sugar • 2 large eggs • 2 large egg yolks • 2/3 cup fresh lemon juice • 1 teaspoon grated lemon zest 1. In a large bowl, beat the butter and the sugar for about 2 minutes. Slowly add the eggs and yolks. Beat for 1 minute. Mix in the lemon juice. The mixture will look curdled, but it will smooth out as it cooks. 2. In a medium, heavy-based saucepan, cook the mixture over low heat until it looks smooth. (The curdled appearance disappears as the butter in the mixture melts.) Increase the heat to medium, and cook, stirring constantly, until the mixture thickens, about 15 minutes. It should leave a path on the back of a wooden spoon and will read 170˚ on a thermometer. Do not let it boil. 3. Remove the curd from the heat. Stir in the lemon zest. Transfer the curd to a bowl. Press plastic wrap on the surface of the curd to prevent a skin from forming and chill the curd in the refrigerator. The curd will thicken as it cools. Covered tightly, the curd will keep in the refrigerator for a week and in the freezer for 2 months. TAKE a LOOK: 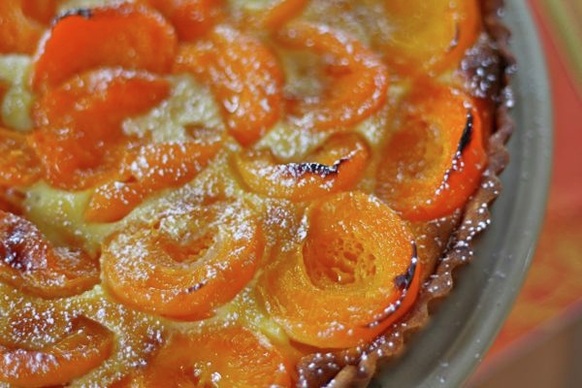 Summer is just a memory… I'm back to using canned fruits in my baking, and that's not such a bad thing. Last week I made a cherry clafoutis tart with canned sour cherries. I just baked an Apricot•Honey•Almond Tart, using canned apricots, and served it at a luncheon I hosted for my friend and architect Kathy Olmstead (see my new kitchen here) of Laurel Ulland Architecture in Minneapolis. We invited Kathy's parents over to see the newly-completed kitchen and were also joined for lunch by Constance, a Parisien intern at Laurel Ulland Architecture for the past several months.  Custard pies and tarts have always been a favorite of mine. My aunt often made plain custard pies with no fruit added, and always invited me to come over for a slice, knowing how excited and appreciative I'd be. Little did she know what a huge influence she would have on my eventual love of baking. Creamy custard in ramekins, eggy-custard fruit tarts, and savory custard filled with cheese and vegetables in a pastry crust, I can never get enough custard! I think what makes this apricot tart so wonderful, is the almond extract that's added to the egg custard (there are also ground almonds in the crust) and the honey. Your kitchen will smell unbelievably good while this is baking. 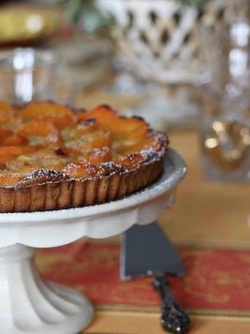 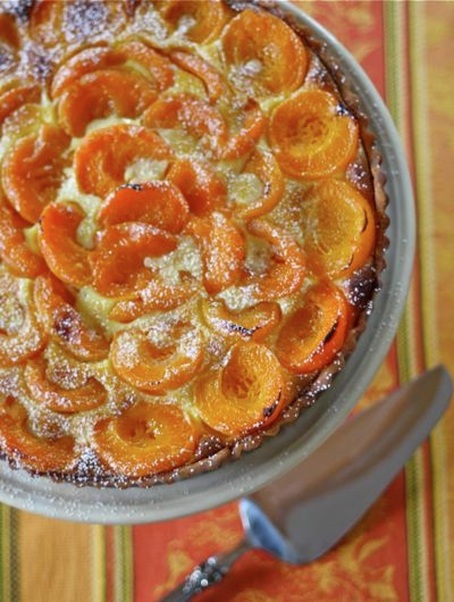 Not crazy about pumpkin pies? Consider adding an apricot tart to your Thanksgiving menu! 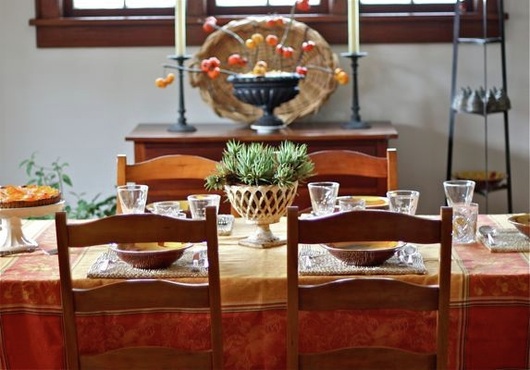 Apricot • Honey • Almond Tart adapted recipe from Patricia Wells At Home In Provence For the filling: • 10 1/2-inch tart crust, recipe below • 1 cup heavy cream • 2 large eggs, lightly beaten • 1 teaspoon pure almond extract • 1 teaspoon pure vanilla extract • 4 tablespoons raw full-flavored honey • 2 tablespoons flour • 3 to 4 cans halved apricots, drained and dried thoroughly with paper towels • Confectioners' sugar, for garnish 1. Preheat oven to 375˚F. 2. In a medium-size bowl, combine the cream, eggs, almond and vanilla extracts, and honey. Whisk to blend. Sift in the flour while whisking. 3. Starting just inside the edge of the prebaked tart shell, neatly overlap the halved canned apricots, cut side up. Make 3 or 4 concentric circles, working toward the center. Fill the center with the remaining apricots. 4. Pour the cream evenly over the fruit, filling as closely to the top edge of the pastry shell as possible. Place in the center of the oven and bake until the filling is firm and the pastry is a deep golden brown, approximately 60 minutes. Remove to a rack to cool. Sprinkle with confectioners' sugar just before serving. Sweet Tart Dough makes enough for three tart crusts adapted recipe from Paris Sweets by Dorie Greenspan NOTE: I used a 10 1/2-inch pan for this tart. • 10 ounces (2 1/2 sticks) unsalted butter, at room temperature • 1 1/2 cups confectioners' sugar, sifted • Lightly packed 1/2 cup ground blanched almonds • 1/2 teaspoon salt • 1/2 teaspoon pure vanilla extract • 2 large eggs, at room temperature • 3 1/2 cups all-purpose flour 1. Place the butter in the bowl of a food processor fitted with the metal blade and process, scraping down the sides of the bowl as needed, until creamy. Add the confectioners' sugar and process to blend well. Add the ground almonds, salt, and vanilla and continue to process until smooth, scraping the bowl as necessary. Lightly stir the eggs together with a fork and, with the machine running, add them to the work bowl; process for a few seconds to blend. Finally, add the flour and pulse until the mixture just starts to come together. When the dough forms moist curds and clumps and then starts to form a ball, stop! -- you don't want to overwork it. 2. Gather the dough into a ball and divide it into 3 pieces. Gently press each piece into a disk and wrap each disk in plastic. Let the dough rest in the refrigerator for at least 4 hours before rolling and baking. Wrapped airtight, the dough can be frozen for up to one month. 3. This is a delicate dough because of all the butter. I will place a large piece of waxed paper on my work surface, dust it lightly with flour, and place the dough on top of the paper. I then dust the dough again and cover with the plastic it was wrapped in. I roll the dough between the waxed paper and plastic and continue to dust the dough on both sides when needed. If the dough warms and becomes difficult to work with, I return it to the refrigerator for several minutes. Transfer the dough to the tart pan ( I always peel away the wax paper, but leave the plastic on top until I have the dough in the pan and pressed against the bottom and up the sides), remove the plastic wrap and trim the dough along the edge of the tart pan by rolling with the rolling pin. 4. Place the crust in the freezer to chill and preheat the oven to 350˚F. When the oven has preheated, remove the tart crust from the freezer. Cut a sheet of aluminum foil, rub one side of the foil with butter and place the foil, buttered side down, onto the crust. Fill the foil-lined crust with dried beans or rice. 5. Bake the crust in the center of the oven for 20 to 25 minutes. Remove the beans/rice and the foil. Proceed with recipe for Apricot Tart above. TAKE a LOOK: 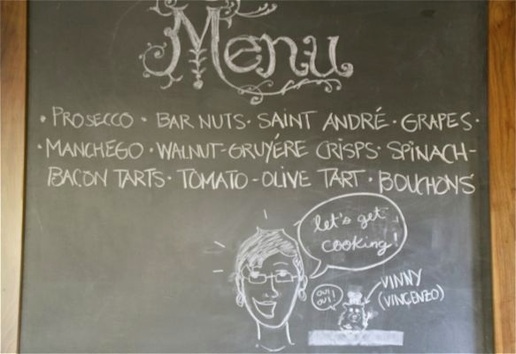 (artwork by Alice and Claire) I spent all day yesterday doing what I love most... baking in my kitchen! Last night I hosted a small get-together that included my friend Kathy (the architect who designed my new kitchen), and others also in the architectural firm at Laurel Ulland Architecture. 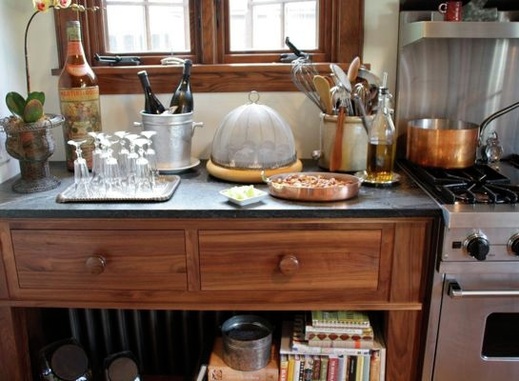 Everyone confirmed what I already knew. It's a GREAT kitchen. My kitchen is proof that you don't need a huge space to have a good, working kitchen. If the space is designed well, it will function well. Before, I didn't have much usable counter space. 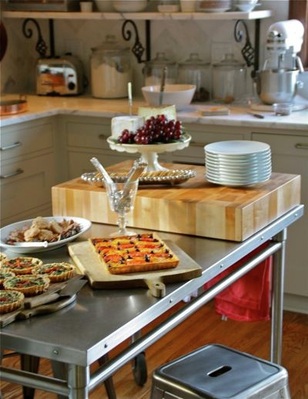 By moving my range from the north wall to the west wall, I now have this massive stretch of counter. By changing out the windows and installing the black walnut "table" with soapstone above my radiator, I now have counter space where there was none before. That soapstone counter is now considered my husbands "wine station". After this renovation, I cannot stress enough - if you are considering putting in a new kitchen, or doing any major changes to your home, use an architect. This kitchen would not be this kitchen without Kathy's knowledge and dedication. I could not have done this without her. Using good people will help you avoid costly mistakes. All you'll have to worry about is what you will be cooking next. 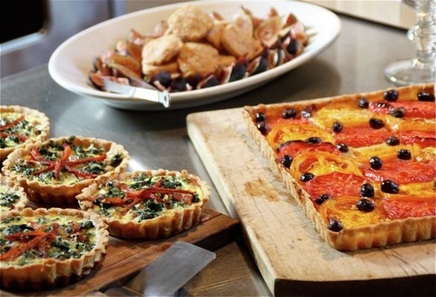 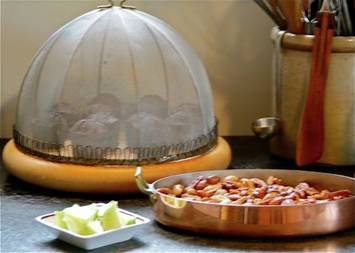  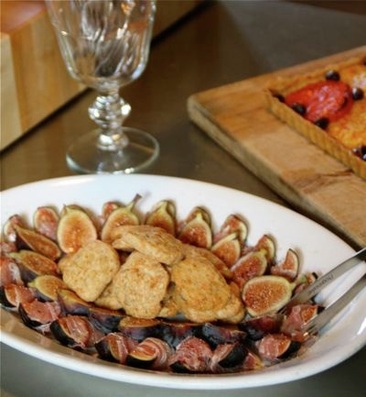 Recipes for Walnut-Gruyére Crisps and Union Square's Bar Nuts to follow in the next few days. YOU MIGHT ALSO LIKE: 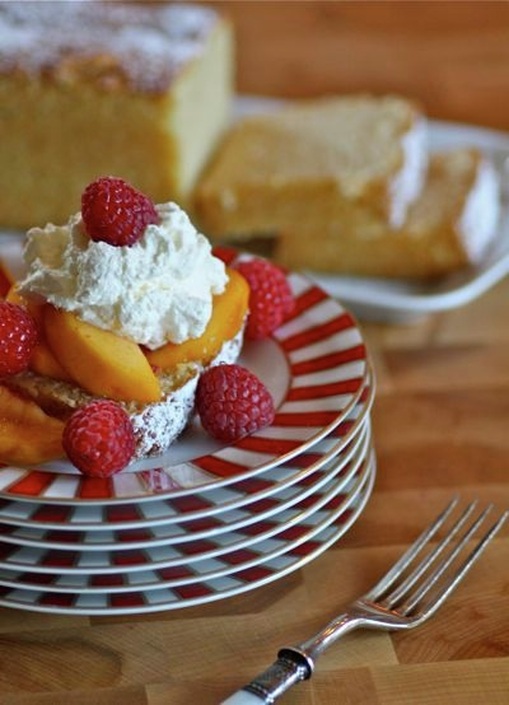 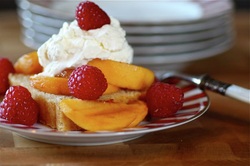 I've been scrambling; trying to do as much as possible with the fresh fruits and vegetables of summer 2010 before it's over. I feel cheated in a way. I feel like I missed out on enjoying produce that I wait an entire year for. Unfortunately, I just shut down during the kitchen renovation. I just couldn't deal with a make-shift kitchen in the corner of a dingy, basement laundry room. But that's history now. I won't go there anymore. I'm too busy trying to make up for lost time. We just hosted our second dinner of the holiday weekend with one to go. Tonight's meal consisted of (what else) tomatoes. No big surprise there. And I made what we eat non-stop during tomato season... a Tomato Tart. We followed that with a big pot of Corn and Bacon Chowder, and we ended the meal with a slice of Vanilla Loaf Cake, topped with fresh peaches and raspberries and a scoop of freshly whipped cream. 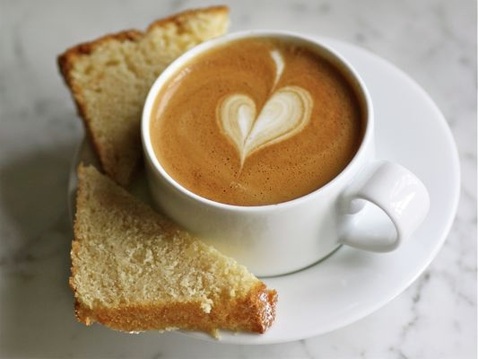 The Vanilla Loaf Cake is delicious with fresh summer fruits and whipped, heavy cream. But my favorite way to eat it?... In the morning with my coffee, plain and simple. It's great to be back ! Vanilla Loaf Cake • 1 cup chilled heavy cream • 2 large eggs • 1 teaspoon vanilla extract • 1 1/2 cups unbleached all-purpose flour • 1 cup granulated sugar • 2 teaspoons baking powder • 1/2 teaspoon salt 1. Preheat oven to 350˚F. 2. Beat the heavy cream in a chilled bowl until stiff. Beat the eggs and vanilla together until light and fluffy; fold into the stiffly beaten cream. Mix the remaining ingredients together. Slowly sift and fold the dry ingredients into the egg and cream mixture, gently but making sure to combine thoroughly. 3. Fill a greased 9-cup loaf pan with the batter (I like to line mine lengthwise with a long strip of wax paper that extends beyond the edges of the pan). Bake until the cake pulls away from the sides of the pan, 50 to 60 minutes. Cool cake in pan 10 minutes; invert onto a wire rack and cool completely. Sprinkle with powdered sugar before serving.  YOU MIGHT ALSO LIKE : 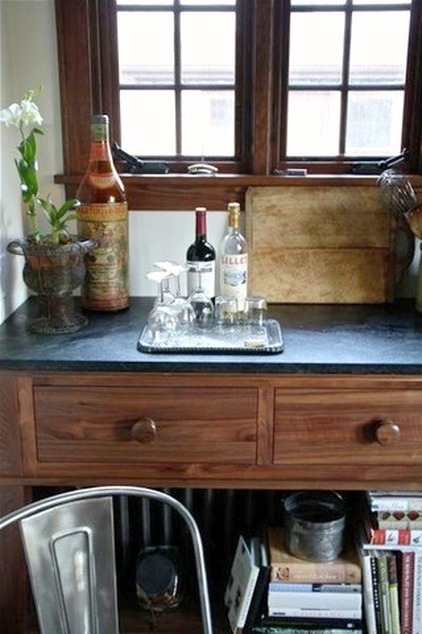 One dinner party down; two to go. 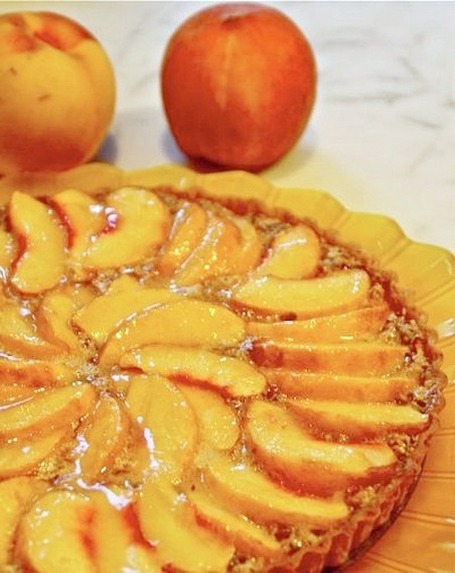 We hosted our first dinner party Friday night. And where do you think everyone hung out? I made a Peach Frangipane Tart for dessert. Peach Frangipane Tart recipe from Four-Star Desserts by Emily Luchetti • 1 cup (4 ounces) almonds, toasted and coarsely chopped • 4 tablespoons unsalted butter, softened, plus 4 tablespoons unsalted butter, melted • 1/3 cup plus 1 tablespoon granulated sugar • 1 large egg • 1 prebaked 9 1/2-inch tart shell • 4 ripe peaches • 1 teaspoon lemon juice 1. Preheat oven to 350˚F. 2. In the bowl of an electric mixer, combine the almonds, the 4 tablespoons softened butter, and 1/3 cup of the sugar. Using the paddle attachment, beat for 2 minutes on medium speed. Add the egg and mix for 1 minute. Spread the almond frangipane in the bottom of the prebaked tart shell. 3. Peel, pit, and slice the peaches 1/4-inch thick. Arrange the peaches in a circular pattern on top of the almond frangipane. 4. In a small bowl combine the 1 remaining tablespoon sugar, the lemon juice, and the 4 tablespoons melted butter. Brush half of the mixture over the peaches. 5. Bake until the frangipane is set, 15 to 20 minutes (I baked mine for approximately 25 minutes). Brush the remaining butter-sugar mixture over the top of the tart. Let cool for at least 10 minutes before slicing. 6. Serve the tart warm or at room temperature. YOU MIGHT ALSO LIKE: 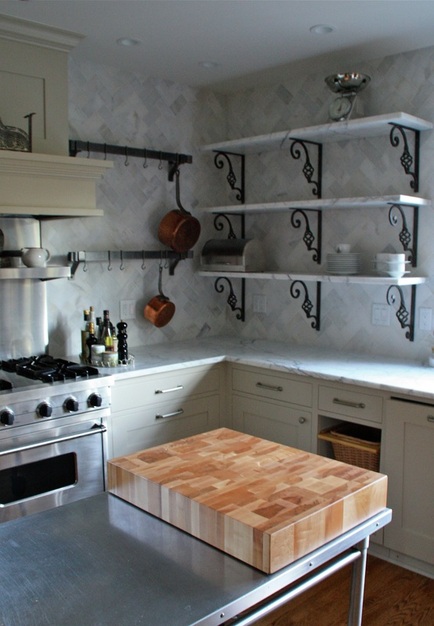 There was no cooking in this kitchen yesterday. It was the day I was waiting for; the day when the marble shelves would go up. I placed a few items on them, but this afternoon the tile grout will be sealed so everything, again, must come off of the counters and off of the shelves. 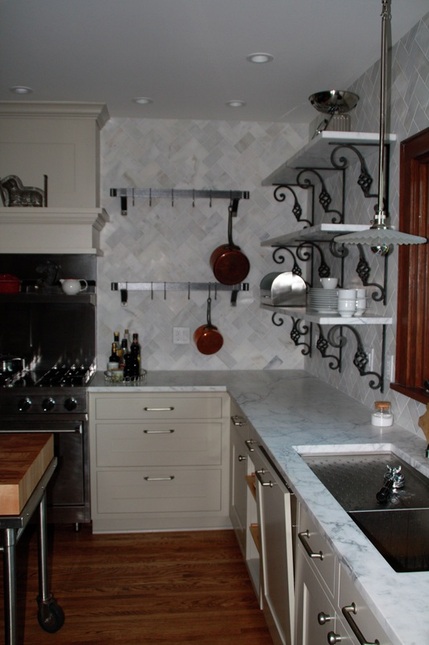 I'm certain tonight will be spent "arranging" everything I've had packed away for the last three months. I need to get to work. I have three dinner parties planned for the upcoming holiday weekend. There is still a little painting to be done. One light that still needs to be installed. But really, it's pretty much done! |


Categories
All
|